Preparing Your Image for the Chocolate Designer App
Chocolate Doodle's online tool lets you transform any image into a unique chocolate design. Whether you’re using a cherished family photo or a creative doodle sketch, these guidelines will help you get the best results.
Below are some tips to optimize your image:
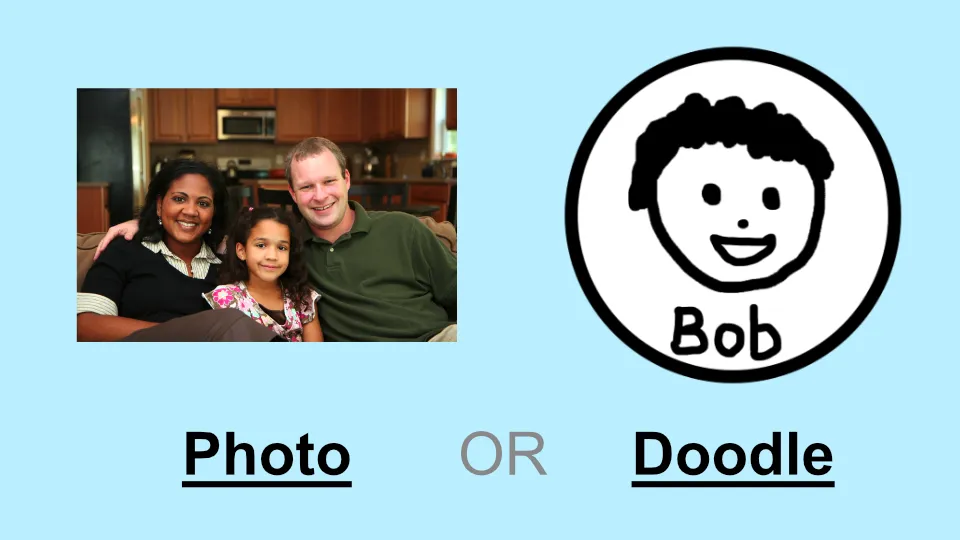
Image Type - Photo
Any photograph can be converted into a chocolate piece featuring a lithographic-style graphic etched onto its surface.
For the best outcome, consider these points:
1. Adequate Lighting
Ensure that your photo is well-lit so every detail is captured clearly. Insufficient lighting can cause a high noise-to-signal ratio, resulting in a blurry image.
2. Strong Color Contrast
Make sure the subject contrasts with its background. If the subject blends into the background, it may not be visible on the final chocolate design.

3. Get Closer to the Camera
Try to take up bigger area of your photo.
Remember that the finished chocolate is small: about 5cm (2 inches) on each side, so the subject must be large enough to be easily visible.
As a guideline, try to have no more than 5 people in one row. If you need to include more individuals, arrange them in multiple rows (for example, a seated front row with a standing back row).
If you're unsure whether your subject will appear clearly on the chocolate, simply upload the photo into our chocolate editor and preview the result. Detailed instructions for using the Chocolate Previewer are provided further down.
Image Type - Doodle
You can also convert any simple drawing (doodle) into dual-colour chocolate.
For optimal results, it’s best to create your drawing digitally (for example, on a tablet). If you draw on paper, additional editing on your computer may be required.
The ideal image dimensions are 1000px by 1000px.
Follow these 3 steps to making your doodle drawing on your computer
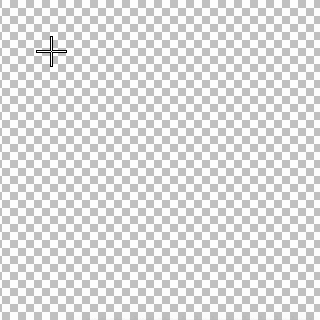
1. Start with a Transparent Canvas
Begin with a blank image that has a transparent background. This allows the chocolate to take on any shape rather than just a square or rectangle. The transparent areas will become the cut-out portions where no chocolate is present.

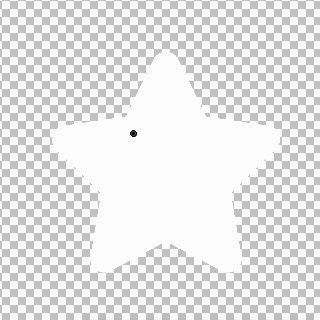
2. Draw the Base Shape
Draw the shape of the chocolate. Ensure that the base shape is filled in white colour.
3. Create Your Doodle!
Now, use the brush tool or pencil tool in your editor, set the stroke width to 20 pixels or greater, and start drawing your design.
Preview Your Chocolate Design
Head over to the Chocolate Editor and upload your image. Then, follow these steps to preview your chocolate design:
1. Review the 2D Graphic Preview
The 2D graphic preview shows a grey-scaled image that represents the chocolate's contour. It will mark any potential issues with yellow (warnings) or red (errors). To resolve these, either upload an updated image or adjust the chocolate's dimensions in the Advanced Settings section.
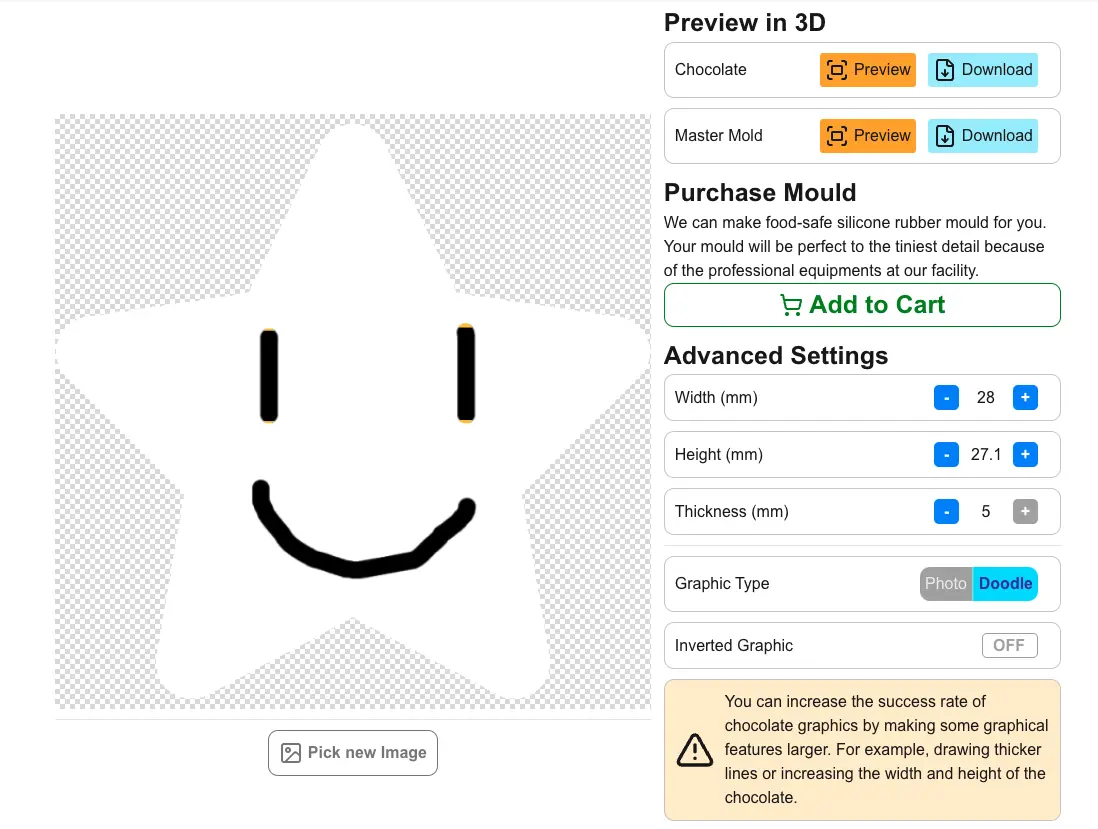
2. Select the Graphic Type
Choose between Photo and Doodle image types. The default is Photo. If your image is a doodle, select 'Doodle' and click on 'Apply Changes' at the bottom of the page to generate a new Graphic Preview.
3. Hit the 'Preview' Button
Click the Preview button for Chocolate to bring up the previewer. Your 3D chocolate design will appear in real time!
How will the Physical Chocolate Look?
The previewer shows a very good approximate of how the actual chocolate will look. The actual result may still differ due to the ingredient of the chocolate, the chocolate making process, etc.
You might want to zoom in or out on the previewer so that its dimensions match the physical chocolate. This will help you determine whether all details are clearly visible.
Conclusion
Creating custom chocolate designs is simple and fun! You can start with one of your own photos or try a sample image on the Chocolate Editor to see how it works. Enjoy designing your unique chocolate creation!